Skip to content

ThermoVibe: room temperature from the phone's sensors

ThermoVibe, an iOS app that reads room temperature from the phone's sensors: 14 screens for onboarding, measuring, calibration and history, in under 6 months.

ThermoVibe

The engagement

Client
ThermoVibe
Industry
Room temperature measurement
Year
To follow
Duration
Under 6 months
Delivered
14 screens, iOS, a splash and 3 onboarding screens, Home with GO and four tiles, the measurement flow with a shareable result and a correction sheet, a 4-step calibration and History, built full stack
Stack
To follow
Role
Full-stack development: design and build of the mobile app

ThermoVibe is an iOS app that reads the temperature of the room from the phone's own sensors. Plainbuilt designed and built it full stack and delivered it in under 6 months: 14 screens covering a splash, 3 onboarding screens, Home, the measurement flow with its result and correction sheet, a 4-step calibration and History. The design rests on one line: lay the phone flat, tap GO, and correct the reading when it is wrong.

Who is ThermoVibe for?

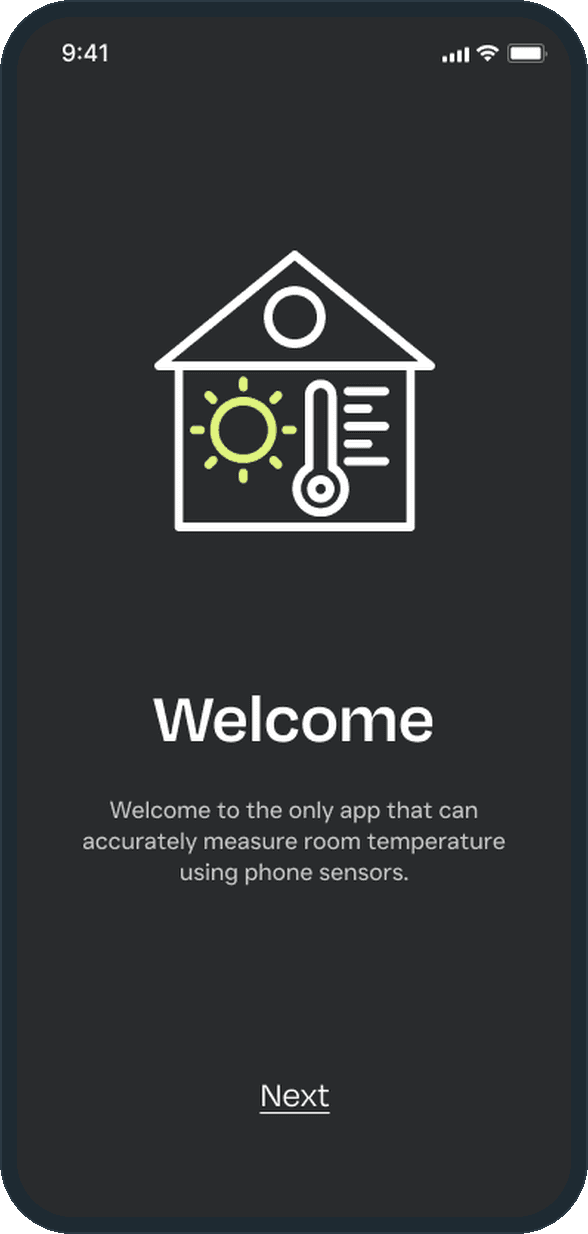
Anyone who wants a room reading without a thermometer. The screens show one person and one phone: none of the 14 screens is a sign-in or a pairing step, because the phone is the device. The onboarding introduces the idea in three screens, Welcome, Technology and Calibration, and after that the app is a GO button and four tiles.

What did Plainbuilt build?

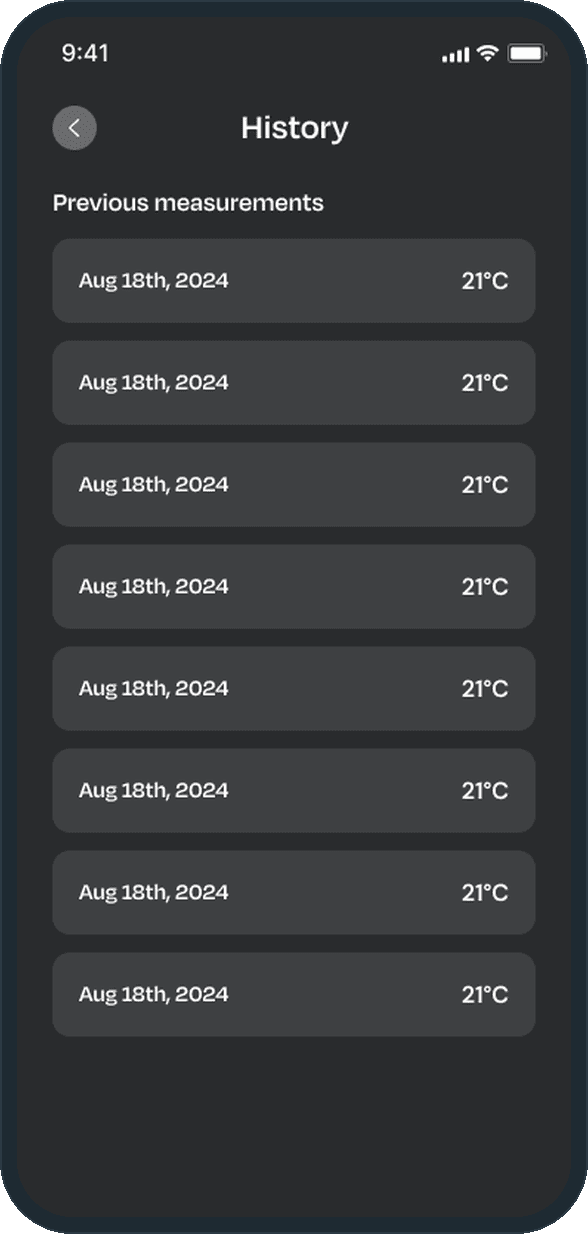
The whole app, full stack. A splash with the circular T mark and the ThermoVibe wordmark on a pale lavender-to-pink gradient. Three onboarding screens. Home, with the GO button, the C/F toggle, History, Calibrate and Feedback. The measurement flow: Start Measurement with the placement drawing, Measuring with the progress bar (the measuring state was drawn two ways, a bar and a ring), the blue result modal with Share and Measure again, and the correction sheet behind Not correct?. A 4-step calibration, one card per step in lavender, lime, coral and gray, with a number input and the C/F toggle on the two steps that take a temperature. And History, a list of previous measurements with the date and the reading on each row.

What does the measurement flow look like?

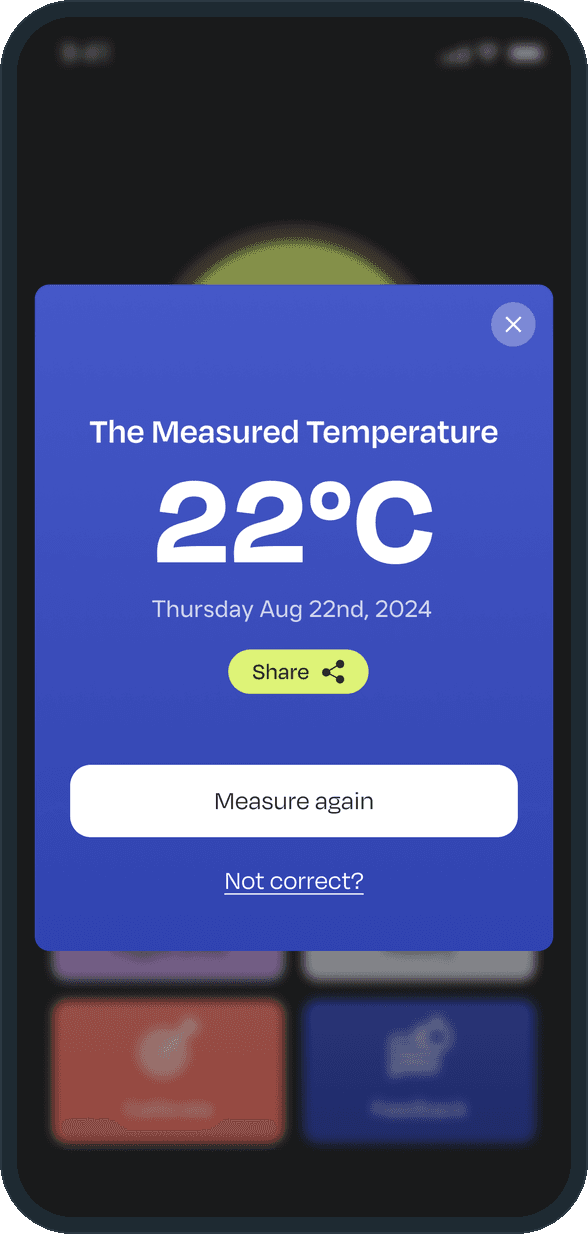
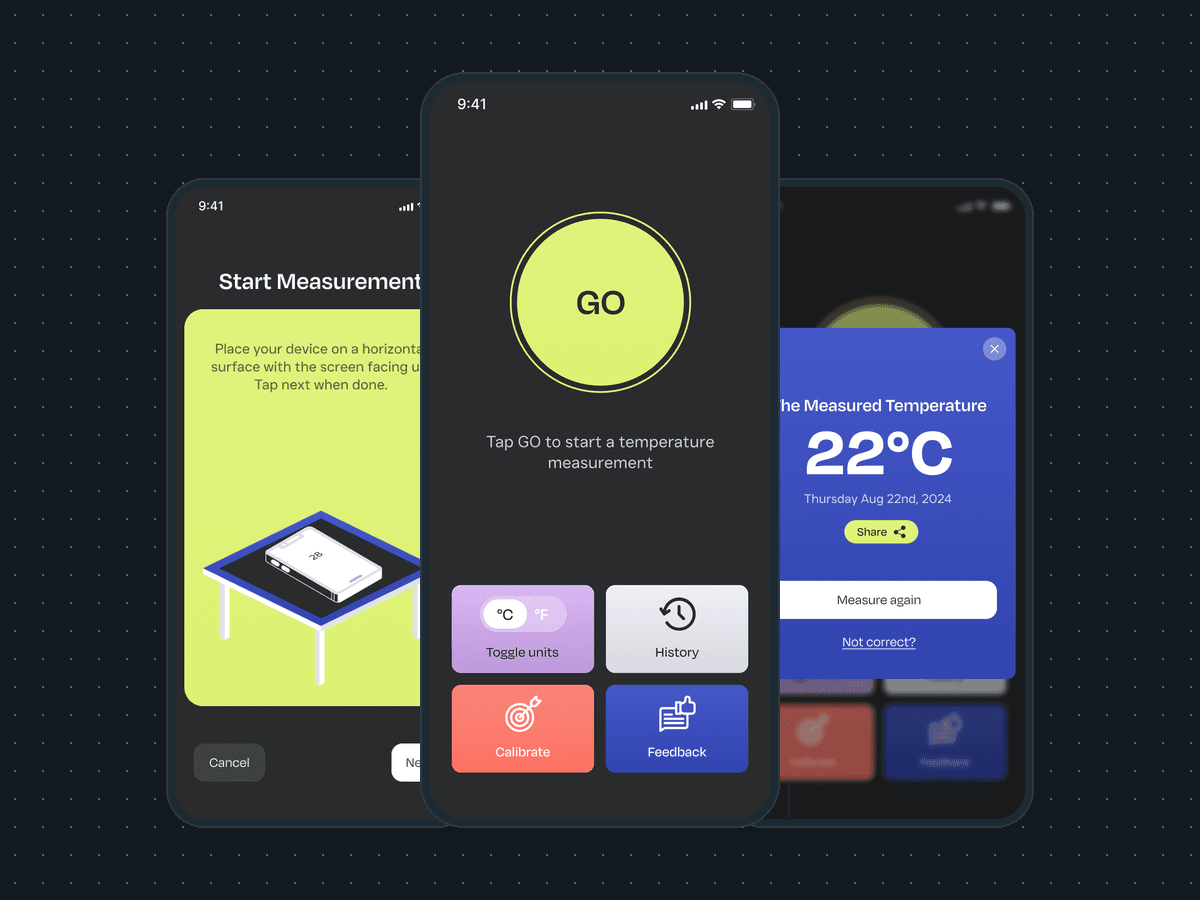
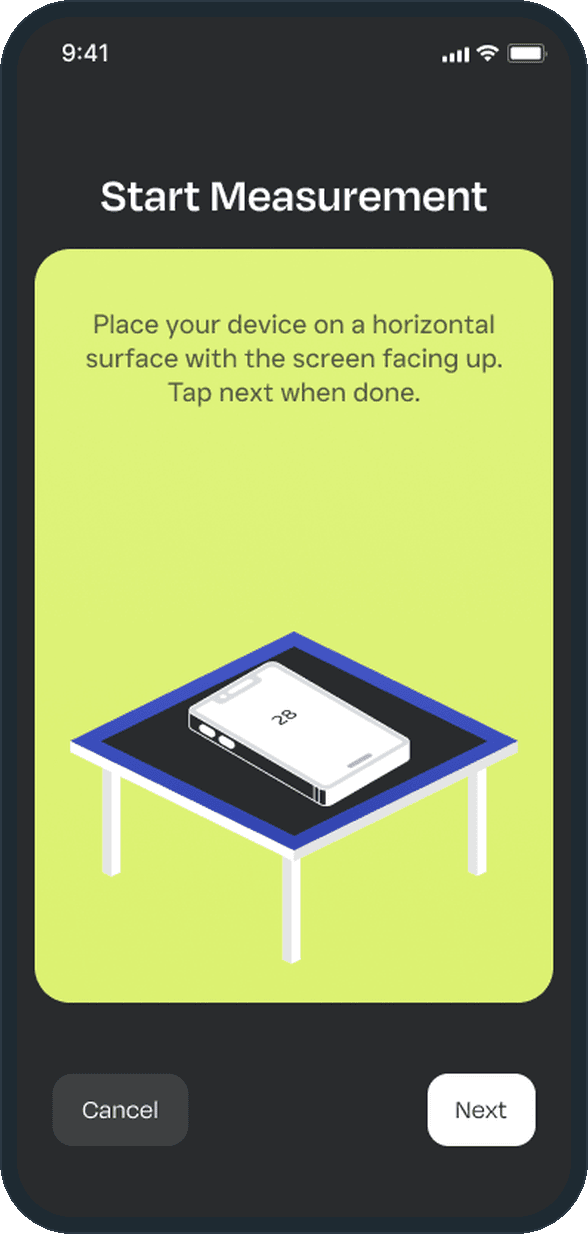
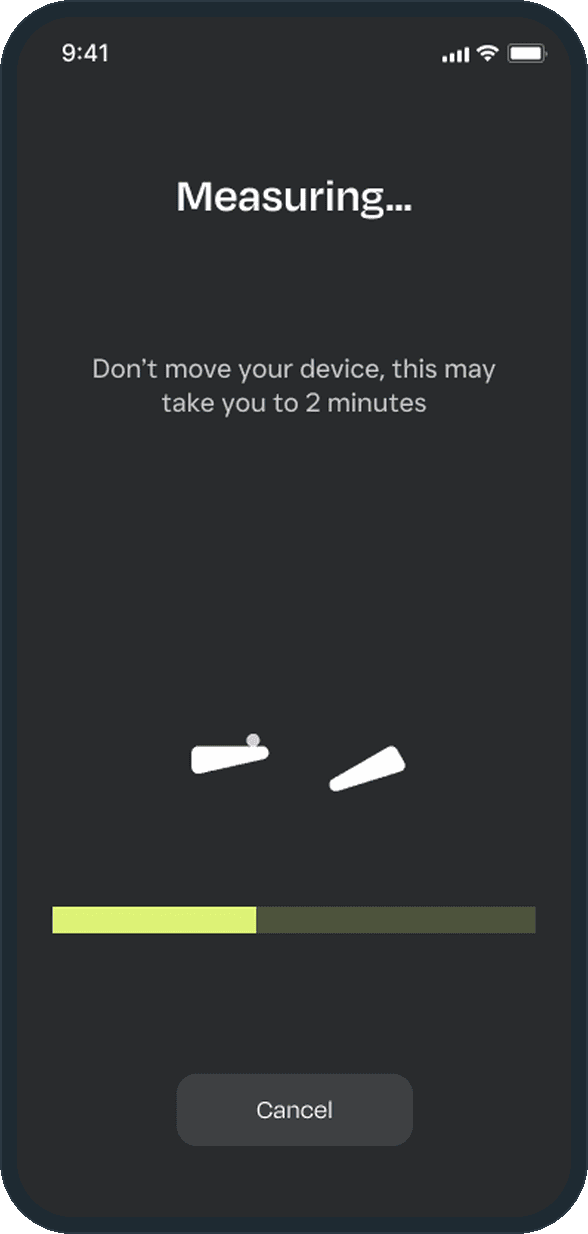
Tap GO. Start Measurement asks for the phone on a horizontal surface, screen up, and shows a phone lying on a table so there is no doubt what that means. Next opens the Measuring screen, which says not to move the device and that the reading may take up to 2 minutes, with a lime bar filling across the bottom and Cancel underneath. When it finishes, the result modal comes up over Home with the reading in large type and the date, a Share pill, Measure again and Not correct?. The reading shows in the unit picked on Home, C or F.

Why does calibration take four steps?

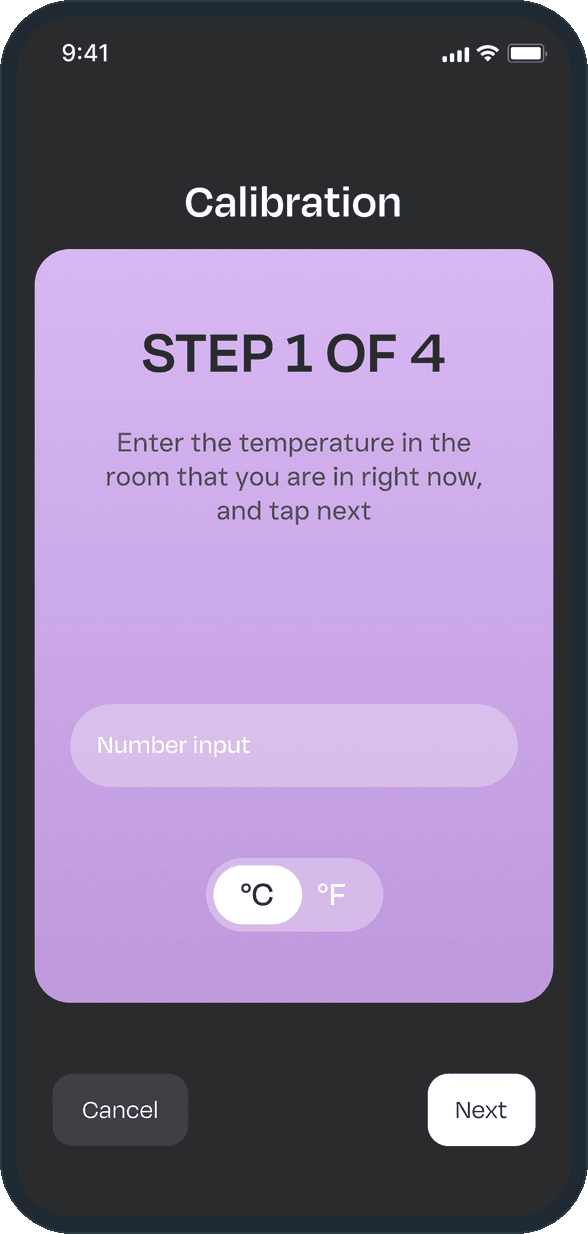
Because the routine asks for two known rooms. Step 1 takes the temperature of the room the person is in; step 2 has them lay the phone flat; step 3 moves them to a room with a different temperature and takes that one; step 4 lays the phone flat again. The onboarding's Calibration screen says why in the product's words: to ensure accuracy, our app calibrates with your environment. Each step is one card in its own color, with Cancel on the left and Next on the right, so the person always knows where they are in the four.

How does a phone take a room temperature reading?

Start Measurement asks the person to place the device on a horizontal surface with the screen facing up, and draws a phone lying on a table on a lime card so there is no doubt what that means; Cancel and Next sit under it. Next opens the Measuring screen, which tells the person not to move the device and that the reading may take up to 2 minutes. A lime progress bar fills across the bottom with Cancel under it.
  • ThermoVibe: How does a phone take a room temperature reading?
  • ThermoVibe: How does a phone take a room temperature reading?

What does the result look like?

A blue modal comes up over Home with the reading in large type, 22°C on the design, and the date of the measurement under it. A lime Share pill sits under the date, then a white Measure again button and a Not correct? link that opens the correction sheet. Home stays blurred behind the modal, so closing it lands the person back on GO.

  • ThermoVibe: What does the result look like?

How do the readings get more accurate?

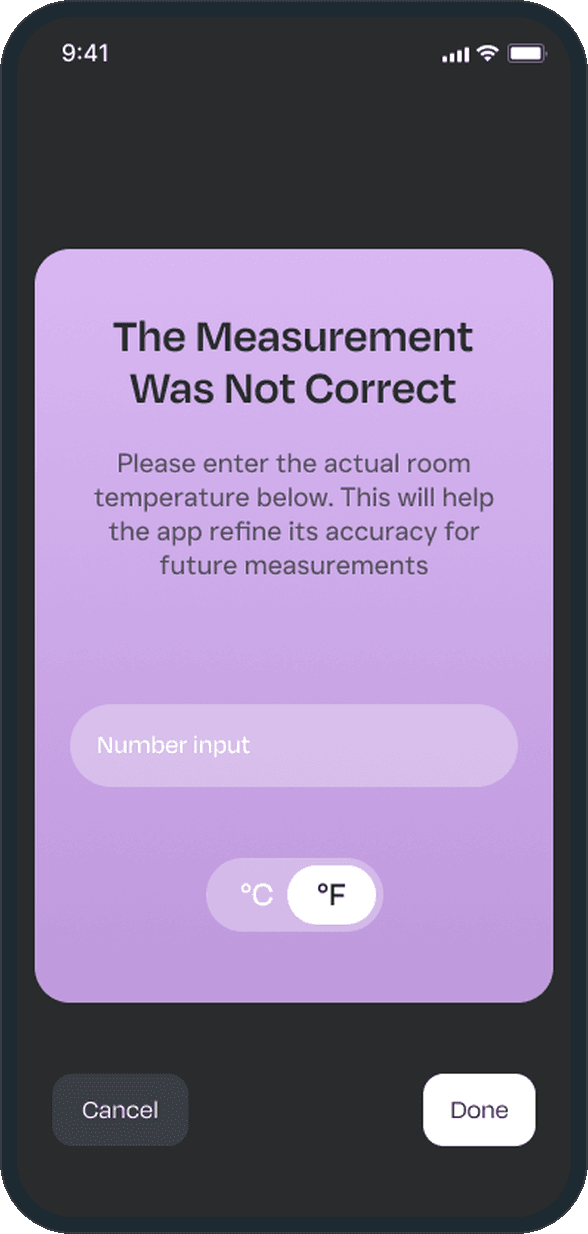
Two ways. Calibrate on Home opens a 4-step routine: type the temperature of the room you are in, lay the phone flat, move to a room with a different temperature, type that one and lay the phone flat again. After any measurement, Not correct? opens a sheet where the person enters the actual room temperature so the app refines future readings. Every input carries the same C/F toggle as Home.

  • ThermoVibe: How do the readings get more accurate?
  • ThermoVibe: How do the readings get more accurate?

What else is on the home screen?

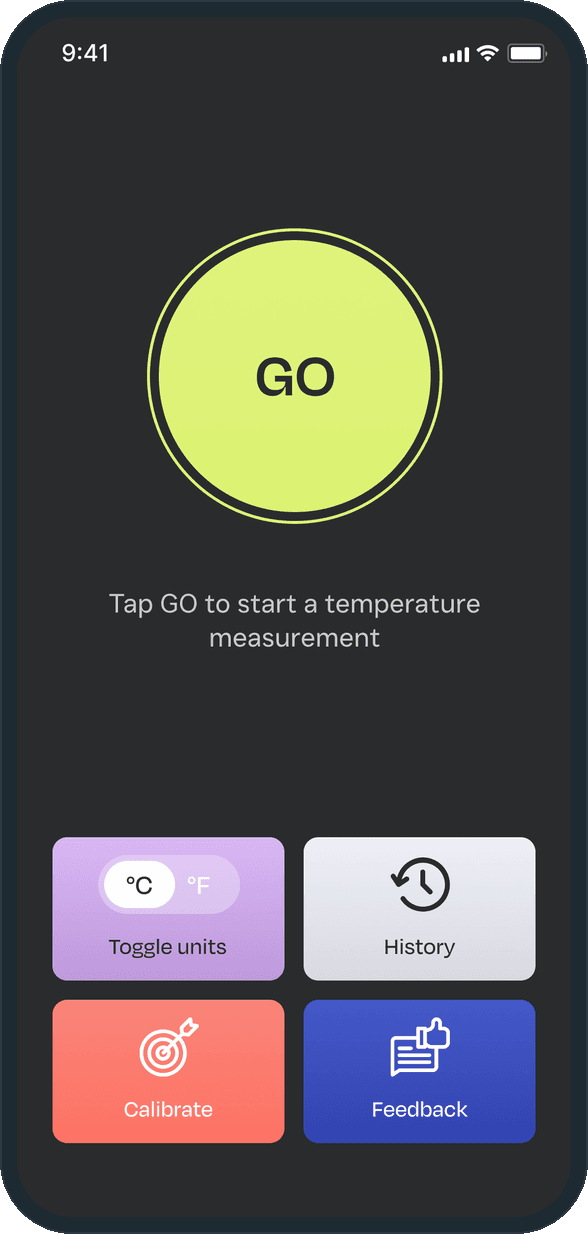
One lime GO circle on charcoal, the line Tap GO to start a temperature measurement under it, and four tiles at the bottom: Toggle units with the C/F switch on lavender, History on light gray, Calibrate on coral and Feedback on royal blue. History lists previous measurements as rows with the date on the left and the reading on the right, with a back button to Home.

  • ThermoVibe: What else is on the home screen?
  • ThermoVibe: What else is on the home screen?

What is ThermoVibe?

Three onboarding screens (Welcome, Technology, Calibration) introduce it before Home, each with a white line icon on charcoal and a Next link. The Welcome screen carries the house-and-thermometer icon and the product's own claim, in its words, to be the only app that can accurately measure room temperature using phone sensors; the Calibration screen says the app calibrates with your environment.

  • ThermoVibe: What is ThermoVibe?

The decisions

  • One button, one job.

    Home is a lime GO circle on charcoal and one line of instruction. Everything else, units, history, calibration and feedback, sits in four tiles at the bottom, so the reason to open the app is the first thing on the screen.

  • The phone is told where to be.

    A reading needs the phone flat, screen up and still, so the app says so with a drawing of a phone on a table before it starts, then repeats the instruction while it measures. The progress bar and the up to 2 minutes line say how long the wait is.

  • A wrong reading is corrected where it is seen.

    The result modal carries a Not correct? link. It opens a sheet that asks for the actual room temperature and feeds it into future readings, so the correction happens on the reading, not in a settings page.

  • Calibrate against two rooms.

    The 4-step routine asks for a known temperature, a flat placement, a second room with a different temperature and a second placement. Each step is one card in its own color, lavender, lime, coral and gray, with Cancel on the left and Next on the right, so the person always knows where they are in the four.

What was the outcome?

Built and delivered in under 6 months

One outcome per item, dated, or not disclosed: never an estimate.

Which of our services apply

Common questions

Did Plainbuilt build ThermoVibe?

Yes. Plainbuilt designed and built it full stack and delivered it in under 6 months.

What does a person need to take a reading in ThermoVibe?

A flat surface. The app asks for the phone to lie on a horizontal surface with the screen up and not be moved, and says a reading may take up to 2 minutes. The reading shows in C or F, can be shared, and can be corrected by typing the actual room temperature.